No Bake Oreo Nutella Cheesecake Recipe
No Bake Oreo Nutella Cheesecake is a dreamy dessert that’s guaranteed to steal the show. Imagin extracte a velvety smooth, lusciously rich cheesecake filling, studded with delightful chunks of crunchy Oreo cookies, all embraced by a decadent Nutella-infused crust. This isn’t just any cheesecake; it’s a no-fuss masterpiece that requires absolutely no oven time, making it perfect for those hot summer days or when you’re simply craving a sweet treat without the baking hassle. Everyone adores this No Bake Oreo Nutella Cheesecake because it perfectly balances the intense, nutty flavor of Nutella with the classic chocolatey goodness of Oreos, creating a symphony of textures and tastes. What truly sets this No Bake Oreo Nutella Cheesecake apart is its effortless elegance and the sheer indulgence packed into every bite. It’s the ultimate crowd-pleaser that’s surprisingly easy to whip up, bringin extractg smiles and satisfied sighs to everyone who tries it.
No Bake Oreo Nutella Cheesecake
Get ready to indulge in a dessert that’s pure bliss! This No Bake Oreo Nutella Cheesecake is an absolute dream for anyone who loves the classic combination of chocolate, hazelnut, and creamy cheesecake. It’s surprisingly easy to make, requires no oven time, and the results are simply spectacular. The crunchy Oreo crust, the rich and velvety Nutella cheesecake filling, and the decadent drizzle – it’s a symphony of textures and flavors that will have everyone asking for seconds. Perfect for celebrations, a special treat, or just when you need a serious chocolate fix, this cheesecake is a guaranteed crowd-pleaser. Let’s dive into creating this irresistible dessert.
Ingredients:
Preparing the Crust
The foundation of any great cheesecake is a sturdy and delicious crust, and this one is no exception. We’re using Oreos for that classic chocolatey crunch, which pairs beautifully with the rich filling.
1. Crush the Oreos: Take your 200g of Oreos and crush them into fine crum extractbs. You can do this by placing them in a food processor and pulsing until they reach a sand-like consistency. Alternatively, you can put them in a sturdy zip-top bag and crush them with a rolling pin – a fun, therapeutic activity! It’s important to get them as fine as possible so they bind well. If you have some larger chunks, that’s okay too; they’ll add a nice texture.
2. Combine with Butter: In a medium bowl, combine the finely crushed Oreos with the 50g of melted butter. Stir until all the crum extractbs are evenly moistened. The mixture should resemble wet sand and hold together when you press it between your fingers. This ensures the crust will be firm once chilled.
3. Press into Pan: Take a 20cm (8-inch) springform pan. Spoon the Oreo crum extractb mixture into the bottom of the pan and press it down firmly and evenly. You can use the bottom of a glass or a measuring cup to create a compact, flat layer. Make sure to press it all the way to the edges of the pan to create a neat barrier. For an extra flourish, you can even press some crum extractbs up the sides of the pan to create a partial crust edge. Once pressed, place the pan in the refrigerator to chill for at least 30 minutes while you prepare the filling. This chilling time is crucial for a firm crust that won’t crum extractble when you slice the cheesecake.
Crafting the Creamy Filling
This is where the magic truly happens! We’re combining luscious cream cheese with the irresistible flavor of Nutella for a filling that’s both decadent and delightfully easy to whip up.
4. Whip the Cream: In a large bowl, add the 200g of cold heavy whipping cream and 50g of sugar. Using an electric mixer (or a whisk and a lot of arm power!), whip the cream until stiff peaks form. This means that when you lift the beaters, the cream will stand straight up without drooping. Be careful not to over-whip, or you’ll end up with butter. Set this aside.
5. Blend Cream Cheese and Nutella: In a separate, larger bowl, add the 500g of softened cream cheese and 200g of Nutella. Beat these together with your electric mixer on medium speed until they are smooth and well combined. Ensure there are no lumps of cream cheese remaining, as this can affect the texture of your cheesecake. The mixture should be a uniform, smooth, and rich brown color.
6. Incorporate Whipped Cream: Gently fold the whipped cream into the cream cheese and Nutella mixture. Use a spatula and fold it in stages, being careful not to deflate the whipped cream. The goal is to incorporate it evenly, creating a light and airy yet stable filling. The mixture should be thick and luscious.
7. Add the Extras: Now it’s time to add those delightful textural elements. Gently fold in the 100g of chopped Oreos. These will provide delightful little pockets of chocolatey crunch throughout the cheesecake. For an extra layer of Nutella goodness, take the 100g of Nutella and dollop it over the filling. You can then gently swirl it in with a knife or toothpick to create marbled ribbons of Nutella. Be careful not to over-mix at this stage, as you want distinct swirls rather than a completely uniform color.
Assembling and Chilling
Bringin extractg it all together is the final, exciting step before the cheesecake sets to perfection.
8. Assemble the Cheesecake: Retrieve your chilled Oreo crust from the refrigerator. Spoon the Nutella cheesecake filling evenly over the crust. Use your spatula to smooth the top as much as possible.
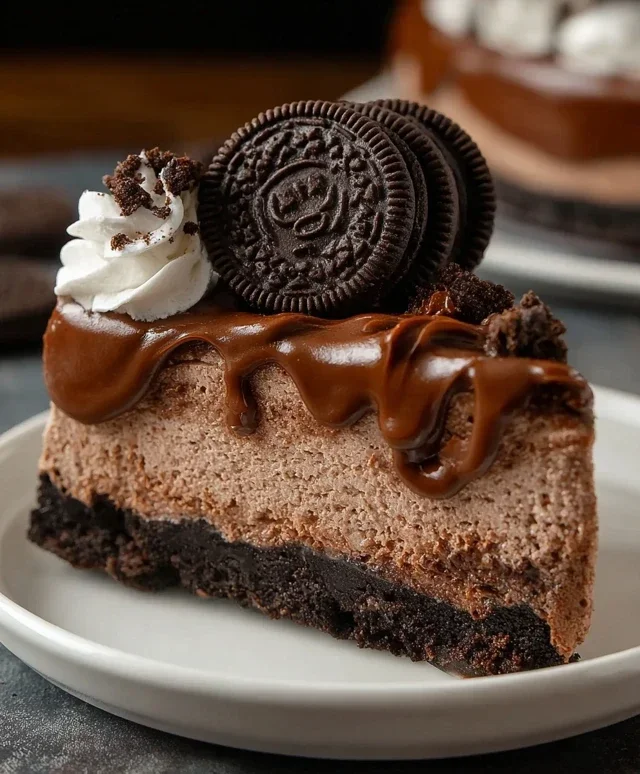
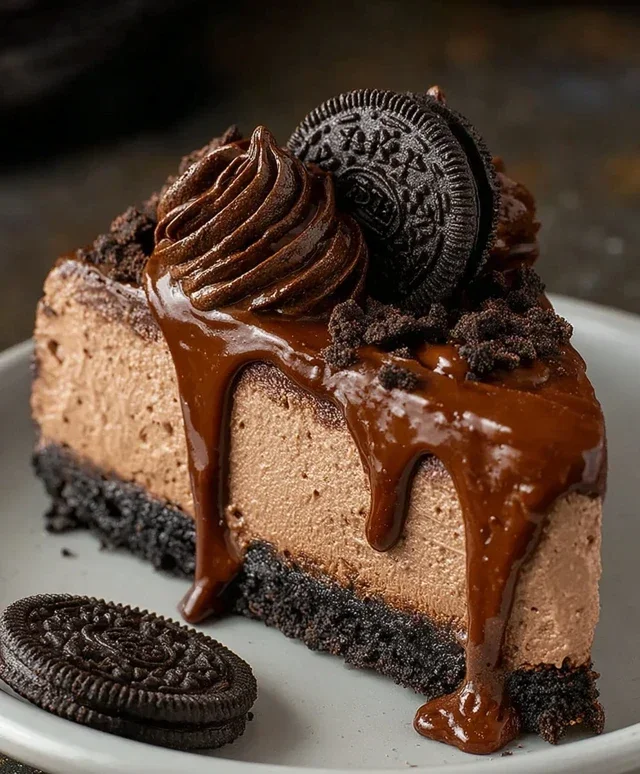
9. Drizzle and Decorate: Gently warm the 100g of Nutella for drizzling. You can do this by placing the jar in warm water for a few minutes or microwaving it in short bursts, stirring in between, until it’s a pourable consistency. Drizzle the warmed Nutella generously over the top of the cheesecake. You can create zig-zag patterns or random swirls. For a final touch, dust the top with the 5 crushed Oreos (without filling) and then artfully arrange the 6 whole Oreos around the edge or in the center for garnish.
10. Chill to Perfection: Cover the cheesecake tightly with plastic wrap or foil. Refrigerate for at least 6 hours, but preferably overnight, to allow the cheesecake to set completely. This chilling time is crucial for achieving that perfect, firm, yet creamy texture. The longer it chills, the better it will hold its shape when sliced.
Once the cheesecake is fully set, carefully remove the sides of the springform pan. Slice and serve this magnificent No Bake Oreo Nutella Cheesecake! Enjoy every delicious bite of this chocolatey, nutty, creamy masterpiece.
Conclusion:
There you have it! This No Bake Oreo Nutella Cheesecake is an absolute triumph of simplicity and flavor. It’s incredibly satisfying to create a dessert this decadent without even turning on the oven. The magic lies in the irresistible combination of crunchy Oreo crust, creamy, luscious Nutella-infused cheesecake filling, and that delightful no-bake ease. It’s perfect for those hot summer days when you want a showstopper dessert without the heat, or simply when you’re craving something truly special without the fuss.
Serving this beauty is a joy. It’s fantastic on its own, allowing the rich flavors to shine. However, I love to add a few extra Oreo crum extractbles on top or even a drizzle of melted Nutella for an extra indulgence. Shaved chocolate or a dollop of whipped cream also make for stunning presentations. Don’t be afraid to get creative with your garnishes!
Feeling adventurous? You can easily tweak this recipe. Consider adding a pinch of espresso powder to the filling for a mocha twist, or fold in some chopped toasted hazelnuts for an added crunch and depth of flavor. This No Bake Oreo Nutella Cheesecake is truly a versatile canvas for your dessert dreams.
I wholeheartedly encourage you to give this recipe a try. It’s a guaranteed crowd-pleaser and surprisingly forgiving, making it perfect for begin extractners and seasoned bakers alike. You won’t regret the effortless assembly and the incredible reward of tasting this delightful creation.
Frequently Asked Questions:
Can I make this cheesecake ahead of time?
Absolutely! This No Bake Oreo Nutella Cheesecake is ideal for making ahead. In fact, it’s best when chilled for at least 4-6 hours, or preferably overnight. This allows the filling to set properly and the flavors to meld together beautifully.
What kind of cream cheese should I use?
For the best texture and flavor, I recommend using full-fat, brick-style cream cheese. Make sure it’s softened to room temperature before you begin extract mixing, as this will prevent lumps and ensure a super smooth, creamy filling.
No Bake Oreo Nutella Cheesecake
A decadent no-bake cheesecake featuring a rich Oreo crust, creamy Nutella filling, and a beautiful Nutella drizzle.
Ingredients
-
200g crushed Oreos
-
50g melted butter
-
500g cream cheese, softened
-
200g Nutella
-
200g heavy whipping cream (35%)
-
50g sugar
-
100g chopped Oreos
-
100g Nutella
-
100g Nutella, warmed for drizzling
-
5 crushed Oreos (no filling)
-
6 whole Oreos for garnish
Instructions
-
Step 1
Combine crushed Oreos and melted butter. Press into the base of a springform pan. -
Step 2
In a bowl, beat cream cheese until smooth. Add 200g Nutella and beat until well combined. -
Step 3
In a separate bowl, whip heavy cream and sugar until stiff peaks form. -
Step 4
Gently fold whipped cream into the Nutella cream cheese mixture. Stir in chopped Oreos and 100g Nutella. -
Step 5
Pour the filling over the Oreo crust and spread evenly. -
Step 6
Drizzle with warmed Nutella. Top with crushed Oreos (no filling) and whole Oreos for garnish. -
Step 7
Chill for at least 4 hours, or until firm, before serving.
Important Information
Nutrition Facts (Per Serving)
It is important to consider this information as approximate and not to use it as definitive health advice.
Allergy Information
Please check ingredients for potential allergens and consult a health professional if in doubt.