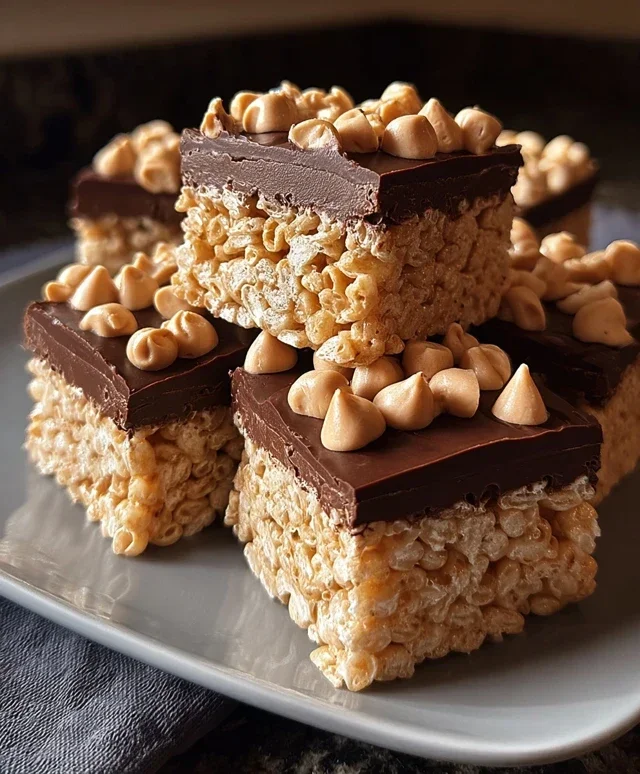
Chocolate Peanut Butter Rice Krispie Squares Recipe
Chocolate Peanut Butter Rice Krispie Squares are a timeless classic for a reason. I mean, who can resist that irresistible combination of chewy, crispy goodness and the dreamy duo of rich chocolate and salty peanut butter? These aren’t just any treats; they’re a nostalgic hug in every bite, bringin extractg back childhood memories with every satisfying crunch. What truly sets these Chocolate Peanut Butter Rice Krispie Squares apart is their effortless magic. They’re incredibly simple to whip up, making them the perfect no-bake indulgence for a busy afternoon or a last-minute party. We’re talking about a dessert that practically makes itself, delivering maximum flavor with minimal effort. Get ready to fall in love all over again with these ultimate comfort food squares!
Ingredients:
Get ready to indulge in a treat that’s pure nostalgia with a decadent twist! These Chocolate Peanut Butter Rice Krispie Squares are the ultimate comfort food, combining the classic crunch of Rice Krispies with the irresistible duo of chocolate and peanut butter. They’re surprisingly easy to make, perfect for a quick weeknight treat, a party, or just because you deserve something delicious. The magic happens when creamy peanut butter and melty chocolate meld with those familiar crispy puffs, creating a chewy, gooey, and utterly satisfying square. I love that I can whip these up in under 30 minutes, and the smell that fills the kitchen while they’re being made is just heavenly.
Let’s Get Cooking!
The process for these squares is pretty straightforward, but paying attention to a few key details will ensure you get the perfect chewy, not-too-hard texture that we all love. It all starts with melting, mixing, and pressing.
Step 1: Prepare Your Pan and Gather Your Supplies
Before you even think about melting anything, the most crucial first step is to prepare your baking pan. I like to use a 9×13 inch baking pan. Lightly grease the pan with butter or cooking spray. Some people prefer to line their pan with parchment paper, leaving an overhang on the sides – this makes lifting the whole slab out to cut much easier. I often do this, and it’s a game-changer for cleanup! Make sure you have all your ingredients measured out and ready to go because once the marshmallow mixture starts cooling, you need to work relatively quickly. Have your Rice Krispie cereal measured out in a large bowl. Also, have your peanut butter measured and ready.
Step 2: Melt the Marshmallow Mixture
In a large saucepan over low heat, melt the ¼ cup of unsalted butter. Once the butter is completely melted, add the marshmallows. I find that using mini marshmallows melts a little faster and more evenly, but regular-sized ones work perfectly too. Keep stirring the marshmallows constantly with a spatula or wooden spoon. You want them to melt slowly and gently. Avoid high heat, as this can cause the marshmallows to scorch or become too stiff once they cool. Keep stirring until the marshmallows are completely smooth and there are no lumps remaining. This is where you’ll notice the wonderful, sweet aroma starting to fill your kitchen.
Step 3: Stir in the Peanut Butter and Chocolate
Once the marshmallows are smooth and fully melted, remove the saucepan from the heat. This is the exciting part where we introduce the star players: peanut butter and milk chocolate chips. Add the ½ cup of peanut butter to the melted marshmallow mixture. Stir it in thoroughly until it’s completely incorporated and the mixture is a uniform, creamy brown. The warmth from the marshmallows will help the peanut butter melt and become easier to mix. Now, immediately add the 1 cup of milk chocolate chips. Stir gently until the chocolate chips begin extract to melt and create beautiful swirls of chocolate throughout the peanut butter and marshmallow mixture. You don’t need to fully melt all the chocolate chips at this stage; a few little bits of melted chocolate throughout will be delicious. The residual heat will continue to melt them as you mix.
Step 4: Combine with Rice Krispies
Now for the grand finnon-alcoholic ale of mixing! Pour the marshmallow, peanut butter, and chocolate mixture over the 6 cups of Rice Krispie cereal in your large bowl. Using your greased spatula or a sturdy spoon, gently but thoroughly fold the cereal into the mixture. You want to coat every single Rice Krispie puff with that gooey, delicious concoction. Be careful not to overmix or crush the cereal too much, as this can lead to a denser, less airy square. The goal is to have a well-combined, sticky mass that will hold its shape. If you’re adding chopped peanuts for extra crunch and peanut flavor, this is the time to stir them in as well.
Step 5: Press into the Pan and Garnish
This step requires a little bit of technique to get those perfectly flat, even squares. Transfer the mixture into your prepared 9×13 inch baking pan. You can use a greased spatula to gently press the mixture down into the pan. For an even smoother finish and to prevent sticking to your hands, lightly grease your hands with butter or cooking spray, or use a piece of parchment paper over the top of the mixture and press down firmly and evenly. You want to create a compact layer without squishing all the air out. Once pressed, if you’re using chopped peanuts for garnish, sprinkle them evenly over the top and gently press them in so they adhere to the squares. Let the squares cool completely at room temperature for at least 30 minutes to an hour. Rushing this step will result in messy, crum extractbly squares. Once cooled, use a sharp knife (which you might want to lightly grease as well) to cut them into squares. Enjoy these delightful treats!

Conclusion:
And there you have it – the ultimate guide to creating delightful Chocolate Peanut Butter Rice Krispie Squares! This recipe is truly a winner because it strikes that perfect balance between nostalgic comfort food and a decadent treat. The familiar crunch of Rice Krispies, combined with the rich, gooey sweetness of melted marshmallows, is elevated by the irresistible duo of chocolate and peanut butter. It’s incredibly easy to make, making it ideal for bakers of all skill levels, and the payoff is enormous in terms of pure deliciousness. These squares are wonderfully versatile, perfect for potlucks, bake snon-alcoholic ales, or just a simple afternoon pick-me-up. I encourage you to give this fantastic Chocolate Peanut Butter Rice Krispie Squares recipe a try – you won’t be disappointed!
For serving, I love them chilled, cut into generous squares, but they’re also fantastic served slightly warm, allowing the peanut butter to be extra gooey. They pair wonderfully with a cold glass of milk or even a scoop of vanilla ice cream. If you’re looking to mix things up, consider adding a sprinkle of sea salt on top for a sweet and salty kick, or swirl in some caramel sauce for an extra layer of indulgence. You could also experiment with different types of chocolate chips, like dark or white chocolate, for a unique twist. Get creative and make these squares your own!
Frequently Asked Questions:
How do I prevent my Rice Krispie squares from becoming too hard?
The key to soft and chewy Rice Krispie squares is not to press them down too firmly into the pan. Gentle pressing is all that’s needed. Over-compressing can squeeze out the air and result in a dense, hard treat.
Can I use a different type of cereal?
While Rice Krispies are classic for a reason, you can experiment with other puffed rice cereals or even corn flakes for a slightly different texture and flavor profile. Just ensure the cereal is crisp before you start!
Chocolate Peanut Butter Rice Krispie Squares
A decadent twist on the classic Rice Krispie treats, featuring rich chocolate and creamy peanut butter.
Ingredients
-
6 cups Rice Krispie cereal
-
1/2 cup peanut butter (smooth or crunchy)
-
1/4 cup unsalted butter
-
40 regular size marshmallows
-
1 cup milk chocolate chips
-
chopped peanuts for garnish (optional)
Instructions
-
Step 1
Grease a 9×13 inch pan with butter or cooking spray. -
Step 2
In a large saucepan over low heat, melt the butter. -
Step 3
Add the marshmallows and stir until completely melted and smooth. -
Step 4
Remove from heat. Stir in the peanut butter until well combined. -
Step 5
Add the Rice Krispie cereal and stir until evenly coated. -
Step 6
Gently fold in the milk chocolate chips. They will partially melt. -
Step 7
Press the mixture evenly into the prepared pan using a greased spatula or wax paper. Sprinkle with chopped peanuts if desired. -
Step 8
Let cool completely before cutting into squares.
Important Information
Nutrition Facts (Per Serving)
It is important to consider this information as approximate and not to use it as definitive health advice.
Allergy Information
Please check ingredients for potential allergens and consult a health professional if in doubt.