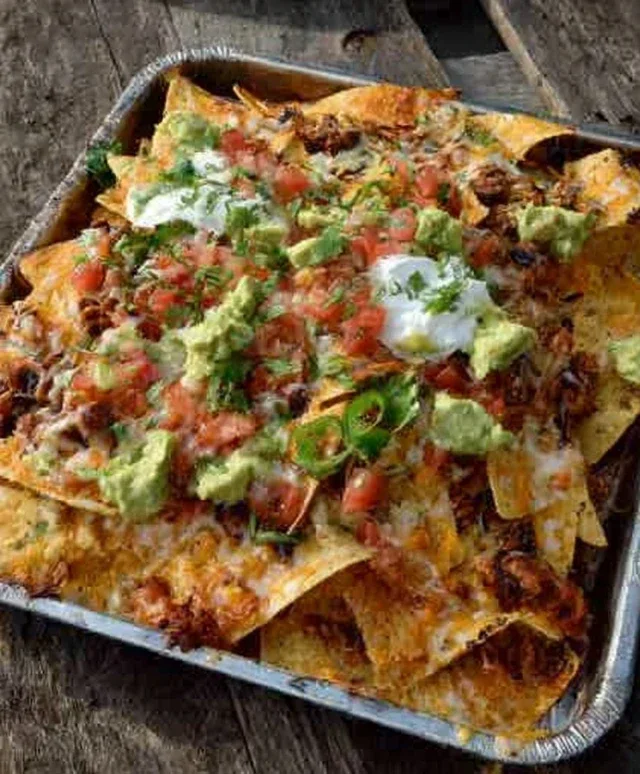
Campfire Grilled Nachos- Easy S’mores Inspired Treat
Campfire grilled nachos are more than just a snack; they’re an experience. Imagin extracte this: the crackling fire, the scent of pine in the air, and a plate piled high with gooey cheese, spicy beans, and all your favorite toppings, all kissed by the smoky embrace of an open flame. There’s something incredibly satisfying about diggin extractg into a plate of campfire grilled nachos that you just can’t replicate indoors. It’s the communal joy, the slightly charred perfection, and the sheer deliciousness that makes them an absolute must-have for any outdoor adventure. Forget flimsy foil packets; we’re talking about elevating your camping cuisine to legendary status with these incredible campfire grilled nachos. They’re easy to make, incredibly versatile, and guaranteed to be the highlight of your next gathering under the stars.
Ready to master the art of smoky, cheesy goodness?
Campfire Grilled Nachos
There’s something truly magical about cooking over a campfire. The smoky aroma, the crackling flames, and the sheer satisfaction of creating a delicious meal with just the elements. And when it comes to campfire cooking, few things hit the spot quite like a glorious plate of grilled nachos. Forget your oven; these campfire nachos are elevated, smoky, and utterly irresistible. Perfect for a starry night, a backyard gathering, or any adventure that calls for some cheesy, savory goodness. This recipe is designed to be forgiving and adaptable, so feel free to swap out ingredients based on what you have or what your taste buds are craving. Let’s get started on what promises to be an unforgettable culinary experience!
Ingredients:
Getting the Campfire Ready
The key to amazing campfire nachos is managin extractg your heat. You don’t want a ragin extractg inferno that will instantly scorch your chips, nor do you want embers that have cooled too much. Aim for a bed of glowing embers with a moderate, consistent heat. This will allow your nachos to melt and cook through without burning. If you’re using a grate, place it about 6-8 inches above the coals. If you’re lucky enough to have a Dutch oven or a cast-iron skillet that can withstand campfire heat, this will be your best friend for even cooking. For a simpler approach, we can create a foil packet.
Cooking the Ground Meat
Before we even think about assembly, we need to get our ground meat seasoned and cooked. This is a crucial step that infuses flavor throughout your nachos. In a skillet over your campfire (or if you’re pre-cooking at home and bringin extractg it with you), brown the ground meat, breaking it up into small pieces. Once it’s mostly cooked through, drain off any excess grease. Add the taco seasoning and about 1/4 cup of water. Stir well and let it simmer for a few minutes until the sauce has thickened and coated the meat. This will make your meat incredibly flavorful and moist. If you’re using refried beans, you’ll want to heat those separately as well, perhaps by adding a splash of water and warming them in a pot.
Assembling the Nachos
This is where the magic truly begin extracts to take shape. You have a couple of excellent options for how to assemble your nachos for the campfire.
If you have a campfire-safe skillet or Dutch oven:
1. Start by spreading a layer of tortilla chips evenly across the bottom of your skillet or Dutch oven. Don’t overcrowd it; you want each chip to have a chance to get deliciously cheesy.
2. Spoon about half of the seasoned ground meat mixture over the chips.
3. Next, distribute half of your drained and rinsed beans (or dollop your refried beans) over the meat.
4. Sprinkle about a third of your shredded cheese over the meat and beans. This will help bind everything together.
5. Repeat the layers: another layer of chips, the remaining meat, the remaining beans, and another third of the cheese.
6. Finally, top with the remaining cheese.
If you’re going the foil packet route (great for individual servings or if you don’t have a skillet):
1. Tear off large pieces of heavy-duty aluminum foil.
2. Create a “boat” by folding up the edges.
3. Layer your chips, meat, beans, and cheese inside the foil boat, just as you would in the skillet. Make sure the foil is senon-alcoholic aled well to prevent leaks but leaves a little room for steam.
Grilling the Nachos
Now comes the exciting part!
1. Carefully place your skillet, Dutch oven, or foil packets onto the prepared bed of hot coals. If using a grate, position it about 6-8 inches above the embers.
2. Cook for approximately 8-15 minutes, or until the cheese is completely melted and bubbly, and the chips on the bottom are heated through. You’ll want to keep a close eye on them and rotate the skillet or foil packet occasionally to ensure even cooking and prevent burning. If you notice one side browning too quickly, shift it to a cooler spot on the coals or lift it slightly off the heat. The aroma of melting cheese and smoky chips will be your guide!
Adding the Fresh Toppings
Once your nachos are perfectly melted and gooey, it’s time for the fresh, vibrant toppings. This is where you can really customize and add a burst of flavor and texture.
1. Carefully remove your skillet, Dutch oven, or foil packets from the campfire. Use heat-resistant gloves and tongs for safety!
2. Immediately sprinkle the diced tomatoes, diced onion, and your chosen chilis or peppers over the hot, melted cheese. The residual heat will slightly warm these ingredients without making them mushy.
3. Add your diced or sliced avocado.
4. Finally, if you’re using them, dollop on some sour cream, a bit of salsa, and a sprinkle of fresh cilantro. A squeeze of fresh lime juice right before diggin extractg in is an absolute game-changer!
Serve these campfire grilled nachos immediately, directly from the skillet or by carefully spooning them onto plates. Prepare for satisfied sighs and requests for seconds! Enjoy this smoky, cheesy delight under the open sky.

Conclusion:
And there you have it – a foolproof guide to creating delicious campfire grilled nachos that are sure to be a hit on your next outdoor adventure! This recipe is fantastic because it transforms simple ingredients into a smoky, gooey, and incredibly satisfying dish with minimal effort. The beauty of these campfire grilled nachos lies in their adaptability; they’re perfect for a quick and easy campfire meal, a hearty snack during a hike, or even the star of your backyard barbecue.
For serving, these are best enjoyed hot off the grill, straight from the foil packet. Imagin extracte the aroma, the melted cheese pulling away, and that distinct smoky flavor. They’re perfect on their own, but can also be paired with a refreshing side salad or some extra salsa and sour cream for dipping. Don’t be afraid to get creative with your toppings! Consider adding grilled corn, black beans, pulled chicken or beef, or even some jalapeño slices for an extra kick. I really encourage you to give these campfire grilled nachos a try – they’re incredibly rewarding and will become a staple in your outdoor cooking repertoire.
Frequently Asked Questions:
Can I make these ahead of time?
While it’s best to assemble these just before grilling for the freshest taste and perfectly melted cheese, you can pre-chop your toppings and have them ready to go. The assembly process is so quick that it’s hardly a chore!
What kind of cheese works best?
A good melting cheese is key! Monterey Jack, cheddar, or a Mexican blend are excellent choices. For extra creaminess, you can also sprinkle some shredded pepper jack on top.
How do I prevent the foil from tearing?
Using heavy-duty aluminum foil is recommended. Double-layering your foil packets can also provide extra security and prevent any deliciousness from escaping.
Campfire Grilled Nachos
Smoky, cheesy campfire grilled nachos are the perfect outdoor meal or snack. Customize with your favorite toppings.
Ingredients
-
tortilla chips
-
ground pork
-
taco seasoning
-
black beans
-
shredded cheddar cheese
-
diced tomatoes
-
diced onion
-
sliced avocado
-
sliced jalapenos
Instructions
-
Step 1
In a skillet over the campfire, brown the ground pork with taco seasoning until cooked through. Drain any excess grease. -
Step 2
Arrange a layer of tortilla chips on a sturdy, fire-safe platter or foil pan. -
Step 3
Spoon the seasoned ground pork and black beans over the tortilla chips. -
Step 4
Sprinkle generously with shredded cheddar cheese. -
Step 5
Place the platter carefully over medium heat on the campfire grill grate. Cover with foil if needed to help melt the cheese. -
Step 6
Grill for about 5-10 minutes, or until the cheese is melted and bubbly. -
Step 7
Carefully remove from the campfire and top with diced tomatoes, diced onion, sliced avocado, and sliced jalapenos.
Important Information
Nutrition Facts (Per Serving)
It is important to consider this information as approximate and not to use it as definitive health advice.
Allergy Information
Please check ingredients for potential allergens and consult a health professional if in doubt.